Note from Laura: Confession— I am a horrendous baker. Not just bad, but absolutely horrendous. When you’re married to a sweet tooth, that’s kind of a problem. One of my goals in 2018 is to work on my baking skills (or lack there of) and what better time to practice baking than during the holidays? My friend Corie is one of the best (if not the best) baker I know and her treats are known to delight even the biggest savory fans. She’s so good (and such a bad @$$) that she started her own baking business. I asked her to share one of her favorite cookie recipes for the holidays that even us baking rookies can handle.
“Can you bring a dessert?” Let’s face it, that’s a scary question. And not just because it means you’re going to have to mingle with that side of the family. Or because you’ll need to find something to wear that’s cute, but also still fits (if I throw a statement necklace on, will anyone notice my yoga pants?)
No, that’s a scary question because you kind of want to make something, but then again, baking can be such a hassle, it’s expensive, you’re short on time, and the list of reasons could go on. Do you just buy something then? How much should you spend, though? And should it be chocolate? Vanilla? Fruity? Should you get a bunch of different sweets or just go for a big shareable pastry? Are pastries fun or lame? What about a pie? But, what kind of pie?!
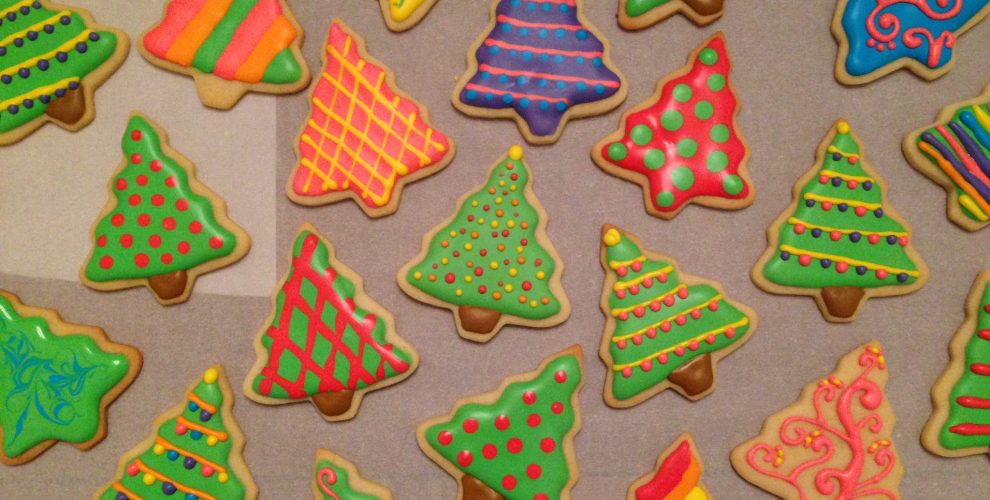
Let’s be real, this internal debate could go on for hours. But fear no more friends! Today, I present to you my favorite holiday cookie recipe. It’s a crowd-pleaser (seriously, you can thank me later for the ridiculous amount of compliments you’ll receive) and it’s quick, which is priority numero uno for me this time of year.
All you need for these cookies are the basics (flour, sugar, butter, eggs, vanilla extract, and baking powder) and a cookie cutter. That’s literally it. And the recipe requires *no* chilling of the dough before you roll it, which is like a ‘thank you baby Jesus’ moment when you’re on a tight schedule. I mean, let’s be serious, who remembers to leave enough time to chill the damn dough? Certainly not me.
I’m also going to give you three ways to decorate these cookies. The ‘I literally have zero time to do this’ way, the ‘I have about 15 extra minutes, but no artistic talent’ way, and the ‘I really need to impress these people so I’m making these the night before’ way. All three ways yield delicious cookies with varying levels of decoration.
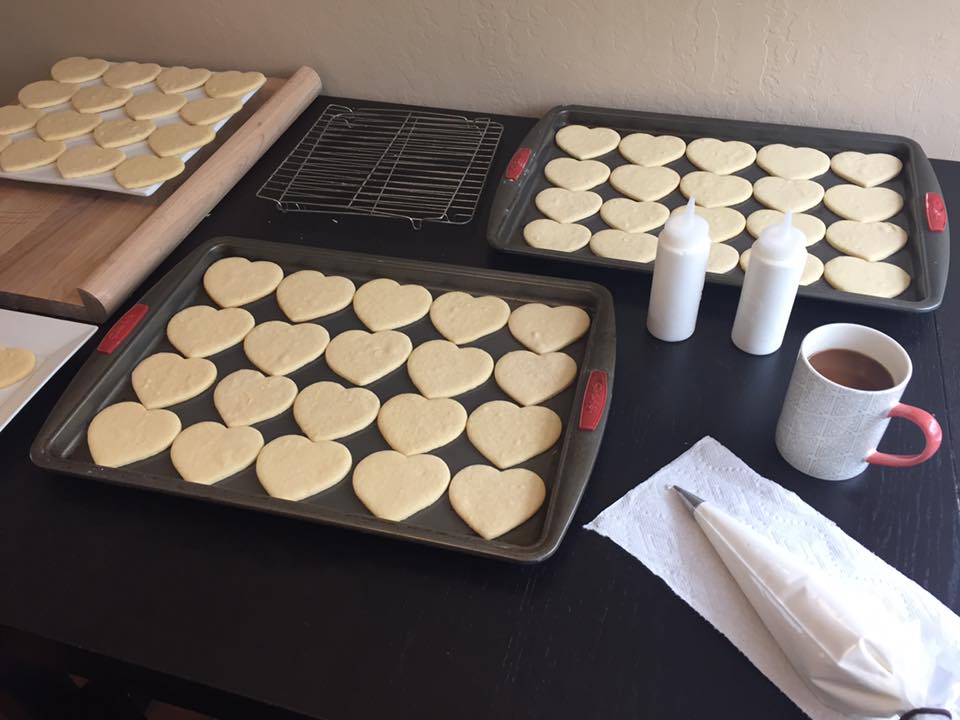
Let’s start with the cookie itself. These are cut-out cookies so you will need a little bit of space to roll out the dough. You’ll also need a rolling pin and cookie cutter, but honestly you can make do with a wine bottle and/or a water glass.

Recipe: Classic Vanilla Sugar Cookies
Yields 25-30 cookies
Tools:
Rolling pin (other options: wine bottle or water glass)
Cookie cutters
Sifter
Stand mixer with paddle attachment or hand mixer
Squeeze bottles*
Food coloring*
Toothpicks*
*If you go with decorating option 3
Ingredients
For the cookies:
1 lb Butter (4 sticks)
2 cups Granulated Sugar
2 Eggs
3 teaspoons Vanilla Extract
6 cups All Purpose Flour
½ teaspoon Baking Powder
For the icing (if you go with option 3):
3¼ cups powdered sugar
2 large egg whites
Food coloring (optional)
Directions for the cookies:
1. Pre-heat your oven to 350 degrees.
2. Line a cookie sheet with parchment paper (preferred method) or spray it with non-stick cooking spray.
3. Sift your flour and baking powder together. (If you don’t have a sifter, stir the flour and baking powder together with a fork).
4. In another bowl, cream the butter and sugar together until combined well. You can use a stand mixer with a paddle attachment or a hand-mixer for about two minutes.
5. Once the butter and sugar is blended, add the eggs one at a time and beat for 1 minute.
6. Add the vanilla.
7. Now add your flour mixture in one cup at a time until the dough barely comes together.
8. Dust your rolling surface with flour. Using a spatula, scrap your dough out of the bowl and onto your rolling surface. Knead the dough a few times until it comes together and is smooth. (Now is the time to sneak a taste if you’re rebellious enough to eat raw cookie dough).
9. Roll out your cookie dough to about ¼ – ½ an inch thick and cut out the cookie shapes, placing each one onto your prepared baking sheet. I’d err on the thicker side when rolling these out.
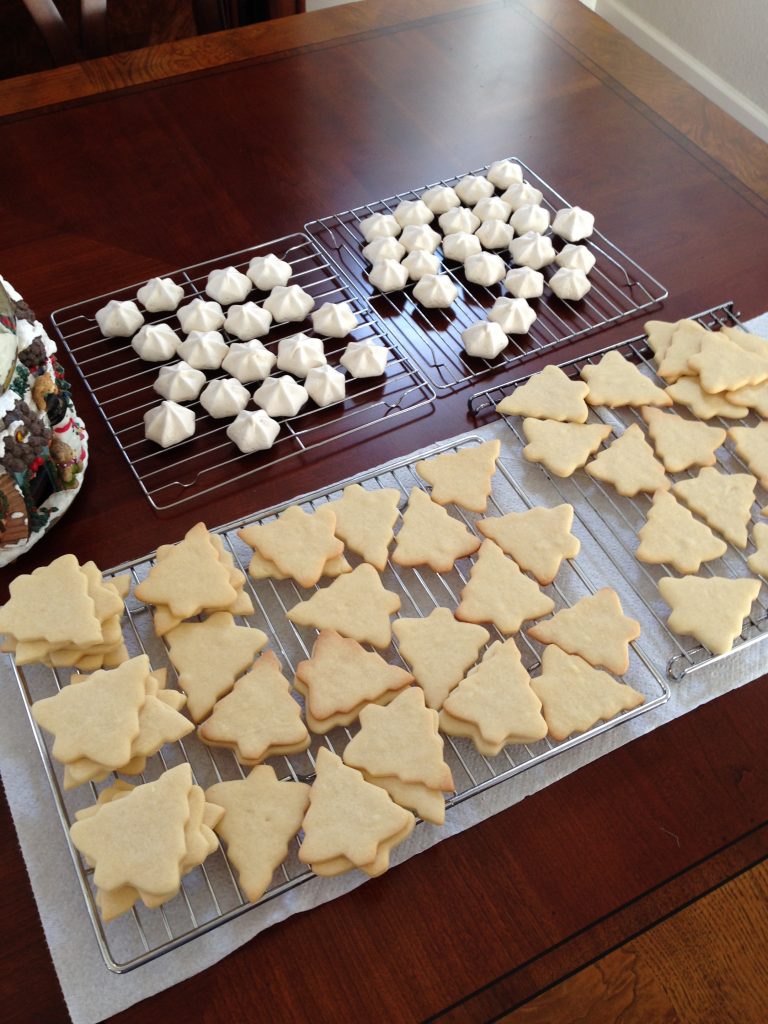
10. Pop those bad boys into the oven for 12-15 minutes. I like to check my cookies at 12 minutes to see if they are done. You do not want to over-bake these. They should stay light and not turn golden-brown.
Now before we get into our 3 decorating methods, let’s talk cookie cutters. Since it’s the holidays, I love to use a Christmas Tree-shaped cookie cutter, but honestly, a heart, star, or even circles will do the trick. Sur La Table sells tons of cookie cutters for a dollar each, plus a decent array of sprinkles. Pro tip: dip your cookie cutter in flour before cutting out your cookies. They won’t stick to the cookie cutter and your shapes will stay intact and recognizable.
Alright, let’s talk decoration!
Decorating Method #1 – I haven’t washed my hair in four days and have zero time to do this.
Right before you stick those cookies in the oven, sprinkle them generously with sugar. Your cookies will be done as soon as they come out of the oven. They will have a pretty, sparkly top that is deliciously sweet and crunchy. Minimalist and classic.
Decorating Method #2 – I’m going to try really hard to make these cookies… until the Bachelor comes on.
This method calls for chocolate chips. Bake the cookies per the recipe and let them cool. (If you’re short on time, stick them in the fridge for about 15 minutes.) Now, melt the chocolate chips. You can do this using a double-boiler or in the microwave. If using the microwave, only melt them for 30 seconds at a time and stir between each heating. Once your chocolate is melted, you have two options. Either dunk half the cookie in at a 45 degree angle or put the melted chocolate in a ziplock bag, snip off a tiny bit of one corner and drizzle chocolate all over the cookie. I like to drizzle the chocolate in straight diagonal lines. Make sure to drizzle the chocolate off the edges of the cookie so it looks profesh. Now, let the cookies set for an hour and you’re done!

Decorating Method #3 – I’m ready to step up my cookie game. LET’S DO THIS!
You go, Glen Coco! This method is my favorite and I literally don’t hear the end of it when I bring these to parties. Method #3 is icing the cookies with royal icing. It’s sounds intimidating, but just takes a little practice and is well worth it!
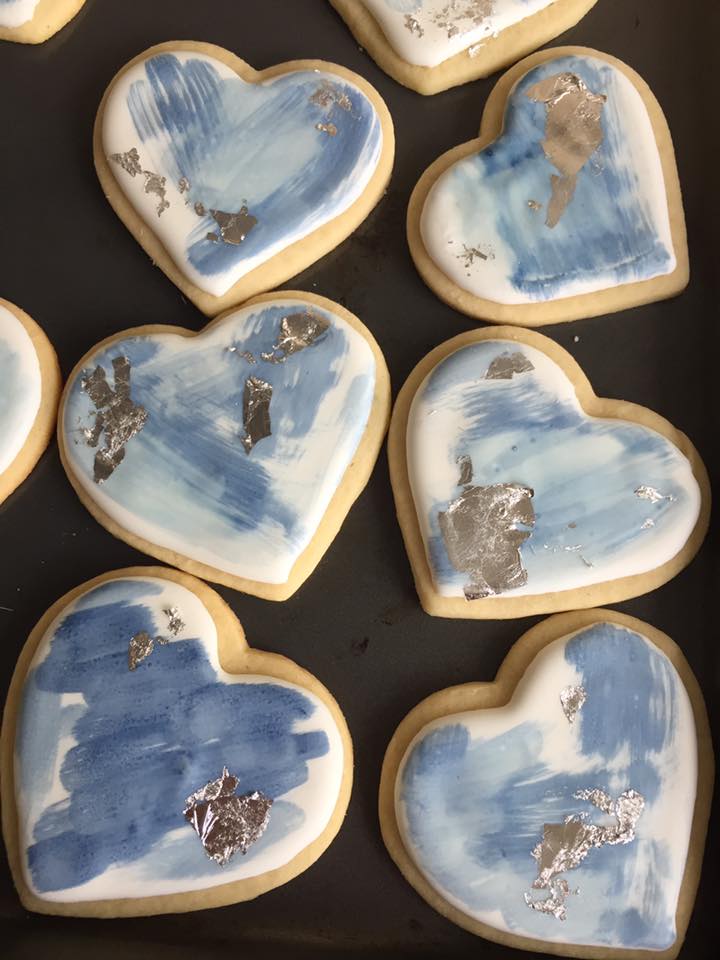
First, you’re going to make royal icing according to the tried-and-true Bon Appetit recipe below. Then you can either swirl two or three colors of icing together to decorate your cookies OR you can ice your cookies with white icing and then paint food coloring on top of them in an abstract pattern for a more modern look. (If you want to get real fancy, you can buy edible gold or silver leaf and top your cookies with a few pieces.)
Directions for the icing:
1. Using an electric mixer on medium-high speed, beat powdered sugar and egg whites until white, thickened, and tripled in volume, about 5 minutes.
2. Add water by the tablespoonful until icing no longer holds a stiff peak. (Seriously, add one spoonful of water at a time and let it blend in— you don’t want your icing to be runny. You just want it to be smooooooth. You can stop your mixer and test your icing by lifting a spoonful out of the bowl and dropping the icing back in. It should blend back in to the rest of the icing in 15 seconds. If it takes too long, add more water. If it blends in too quickly, add more sifted powdered sugar.)
3. Divide icing into smaller bowls and color with food coloring as desired.
Now, you’re going to take your food coloring and fill your squeeze bottles. Going one by one, outline the cookie with icing. You want the icing to be close to the edge of the cookie, but not right up on the edge otherwise your icing will drip over the edge and then you’ll have to eat that messed up cookie (disaster, right?) Next, “flood” the cookie with icing. Squeeze the icing into the middle of your outline trying to color the whole cookie in. If there are areas with no icing, use a toothpick to carefully spread the icing all the way to the outline.

At this point, you can let them dry for 12 hours if you’re going to paint your cookies. If you want to do some psychedelic swirls, you need to act quickly. Working one by one… right after you’ve outlined and flooded your cookie with color #1, take color #2 and pipe straight parallel lines onto the wet icing. As soon as that’s done, take a toothpick and drag it through the icing perpendicular to the lines. Wipe off the toothpick after each pass. You can drag the toothpick the same direction each time or switch it up and drag it up and down alternating each time. Do a few test cookies to get the feel for this technique. These cookies need to dry overnight before you bring them to an event, but trust me, you’ll be the belle of the ball once you bring these with you!
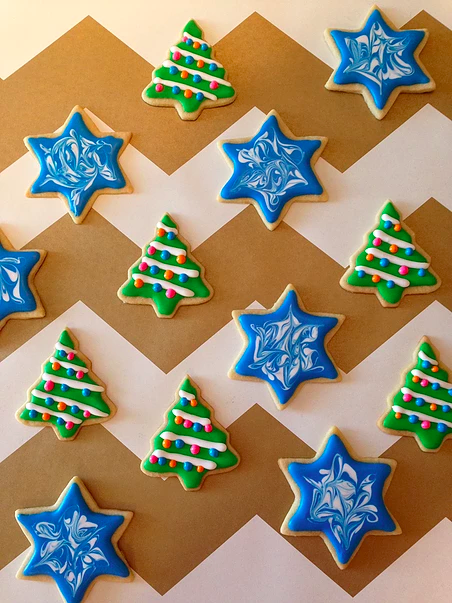
The swirly stars were done by adding a few drops of white onto the wet blue base and then swirling the two colors together with a toothpick. To make the little lights/ornaments on the trees, I just let the green icing base dry for an hour or so and then piped the little white string and the colored dots. So easy and festive!! Just make sure that your icing is in a squeeze bottle or covered by plastic wrap in a bowl otherwise it will start to harden.
If you want to paint your cookies, flood them all with white icing first (remember, go one by one, outline then flood, outline the flood, and let them all dry). Now, in a small bowl mix a few teaspoons of either vodka or lemon extract with a few drops of food coloring. Take your paint brush and dip it in the color mixture and dab off the excess on a paper towel. Now lightly brush the paint brush on the white icing. Again, do a few testers to see how dark you want the color and which patterns you want to make. I like to do just a few random straight brush strokes on each cookie. If you are adding gold leaf, peel a tiny bit off using your fingers or a toothpick and gently place it on the cookie. It will stick on its own.
Now, I dare you to not eat every last cookie before you get to your event! If you have any questions, please ask in the comments! I am happy to help answer any questions you might have about baking or decorating. Good luck, have fun, and enjoy!
Live in the SF area and need sweet treats for an upcoming event? Corie will create treats that will be sure to delight your guests. Learn more on sugaredbycorie.com.


1 Comments